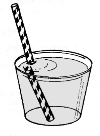
Can you bend a straw without touching it? A simple but interesting light science experiment to help you to see how light travels through water.
 |
 |
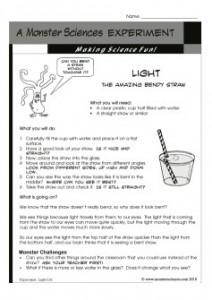
What you will need:
- A clear plastic cup half filled with water
- A straight straw or similar
What you will do:
- Carefully fill the cup with water and place it on a flat surface.
- Have a good look at your straw. Is it nice and straight?
- Now, place the straw into the glass.
- Move around and look at the straw from different angles. Look from different sides, up high and down low.
- Can you see the way the straw looks like it is bent in the middle? Where can you see it best?
- Take the straw out and check it. Is it still straight?
What is going on?
We know that the straw doesn’t really bend, so why does it look bent?
We see things because light travels from them to our eyes. The light that is coming from the straw to our eyes can move quite quickly, but the light moving through the cup and the water moves much more slowly.
So our eyes see the light from the top half of the straw quicker than the light from the bottom half, and our brain thinks that it is seeing a bent straw.
Monster Challenges:
- Can you find other things around the classroom that you could use instead of the straw? Ask your teacher first!
- What if there is more or less water in the glass? Does it change what you see?
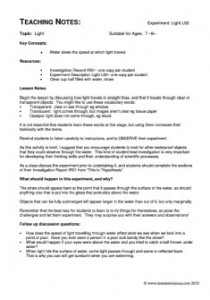
Teaching Notes:
Topic:
Light
Key Concepts:
Water slows the speed at which light travels
Resources:
- Investigation Record IR01– one copy per student
- Experiment Description Light L02– one copy per student
- Clear cup half filled with water, straw
Lesson Notes:
Begin the lesson by discussing how light travels in straight lines, and that it travels through clear or transparent objects. You might like to use these vocabulary words:
- Transparent: clear or see through eg window
- Translucent: light comes through, but images aren’t clear eg tissue paper
- Opaque: light does not come through, eg wood.
It is not essential that students learn these words at this stage, but using them increases their familiarity with the terms.
Remind students to listen carefully to instructions, and to OBSERVE their experiment.
As this activity is brief, I suggest that you encourage students to look for other waterproof objects that they could observe through the water. This kind of student lead investigation is very important for developing their thinking skills and their understanding of scientific processes.
As a class discuss the experiment prior to undertaking it, and students should complete the sections of their Investigation Report IR01 from ”Title to “Hypothesis”.
What should happen in this experiment, and why?
The straw should appear bent at the point that it passes through the surface of the water, as should anything else that is put into the glass that protrudes above the water.
Objects that can be fully submerged will appear larger in the water than out of it, but only marginally.
Remember that the best way for students to learn is to try things for themselves, so pose the challenges and let them experiment. They may surprise you with their answers and observations!
Follow up discussion questions:
How does the speed of light travelling through water affect what we see when we look into a pond or pool. Have you ever seen a person in a pool look bendy like the straw?
- What would happen if your eyes were above the water and you tried to catch a ball thrown under water?
- When light hits the surface of water, some light passes through and some is reflected back. That is why you can still get sunburnt when you are swimming.
Get this experiment here or as part of a bundle of Light Experiments here.

