A simple experiment that enables students to see the wind and the direction it is blowing from. Students can also learn to read a compass as they assess and name the wind direction.
 |
 |
An experiment about weather: Wind direction
What you will need:
• A small rectangle of cardboard
• A pair of scissors
• A hole punch
• A piece of string or wool
• A compass
• A windy day!
What you will do:
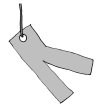
1. Draw a line down the middle of the rectangle from one short end to the other. It should look like 2 long thin rectangles now.
2. Now cut HALFWAY along the line. Bend one of the thin strips slightly forward, and the other one slightly back. This will help it catch the wind.
3. Punch a hole in the other end of the cardboard.
4. Tie the string to the cardboard through the hole. Tie a loop just big enough for your finger in the other end of the string. Don’t make the loop too big or it will blow away!
5. Put your finger in the loop and go outside to a windy spot Hold your finger away from your body and watch what the cardboard does. How does it move? Which direction does it blow? Does it change direction?
What is going on?
As the wind blows against the cardboard it pushes it forward, so you can see which direction it is blowing towards. Winds are named according to where they blow FROM, so a northerly wind for example blows from the north towards the south, and your cardboard would flutter towards the south.
Monster Challenges:
• Can you figure which direction the wind is coming from and then name the wind? Use the compass to check. Is it a southerly wind? A westerly wind? Or perhaps a south-easterly wind.
• Try this experiment again on another day. Has the wind changed direction? Is there more wind or less wind?
TEACHING NOTES: Monster Sciences Experiment: Weather W03
Topic:
Weather
Key Concepts:
Wind can change direction.
Resources:
• Experiment Description Weather A04 – one copy per student
• Investigation Report IR01 – one copy per student
• small rectangles of cardboard about 4″ by 6″ (10cm by 15cm), scissors, hole punch, string or wool, compasses
Lesson Notes:
Begin by explaining the experiment and reminding students of your safety requirements regarding where they can go in the playground to observe the wind. It is great to do this experiment on a particularly windy day, and you also might like to repeat the observations over a few days or weeks to track the changes in wind direction.
I recommend modelling how to use a compass to read direction, making sure the students understand the wind is coming from the opposite direction to the way the cardboard is blowing. To model this have a student come up and blow on the cardboard on the string – the class will be able to see that the student, ie the source of the wind, is opposite the fluttering flag.
Remind students to listen carefully to instructions, and to OBSERVE their experiment. As a class discuss the experiment prior to undertaking it, and students should complete the sections of their Investigation Report IR01 from ”Title to “Hypothesis”.
What should happen in this experiment, and why?
The wind should blow the cardboard so that it lifts up – the wind is therefore coming from the opposite direction. Students should be able to read the compass to check which direction the wind is coming from and then name the wind accordingly.
Follow up questions:
• What is a wind sock? Where are they used? What are they for? [Airports, bridges and other high wind places to show people the wind direction and strength to prevent accidents]. If you are not sure, look it up!
• Have you ever noticed a flag flapping in the wind? If your school has a flag perhaps the class could observe the wind direction most common in your area.
© www.monstersciences.com
Get this experiment here or as part of a bundle of Weather Experiments here.

