Can your students assess what every day items are made of and whether that material was once part of a living thing?
 |
 |
What you will need:
• paper and pencil to record your answers
• a collection of non-living things
What you will do:
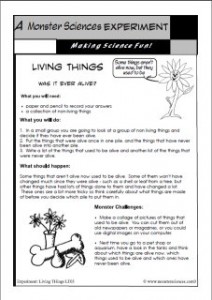
- In a small group you are going to look at a group of non living things and decide if they have ever been alive.
- Put the things that were alive once in one pile, and the things that have never been alive into another pile.
- Write a list of the things that used to be alive and another list of the things that were never alive.
What should happen:
Some things that aren’t alive now used to be alive. Some of them won’t have changed much since they were alive – such as a shell or leaf from a tree, but other things have had lots of things done to them and have changed a lot. These ones are a bit more tricky so think carefully about what things are made of before you decide which pile to put them in.
Monster Challenges:
• Make a collage of pictures of things that used to be alive. You can cut them out of old newspapers or magazines, or you could use digital images on your computer.
• Next time you go to a pet shop or aquarium, have a look in the tanks and think about which things are alive now, which things used to be alive and which ones have never been alive.
Teaching Notes:
Key Concepts:
• Identifying the characteristics of living things.
• Classifying non-living things into those that were once alive and those that were never alive.
Resources:
• Experiment description Living Things LT03 – one copy per student.
• Paper and pencil to record their observations – one per student.
• A collection of non living things, including some that were once alive. These could include leaves, sticks, bark, shells, cocoons, fruit, vegetables and some tougher things such a timber toys, cotton or silk fabric, sugar, flour and maybe even a rubber ball. Once you start looking around you will be amazed what you can include. Non living things could include rocks, plastic items, metal items etc.
Lesson Notes:
Begin the lesson by reviewing the characteristics of living and non-living things from Living Things LT01. Discuss how some non-living things used to be alive and we are going to try and figure out which ones they are.
As a class read through the procedure of this experiment and discuss how the students are going to observe and record which things used to be alive and which have never been alive. Students can be asked to write or draw their observations depending on their age and ability.
Break the students into small groups and give each group a selection of items to classify. If you have time, rotate the groups so that each group sees all the items.
At the end of the lesson gather the students together again and hold a whole class discussion to compile a class list of the things that used to be alive. When a student contributes an idea, ask them to explain why they put that item on that list.
What should happen in this experiment, and why?
Students will generally not struggle with the more obvious items such as leaves, but the more difficult ones such as the fabric and rubber balls will be great discussion starters. You may like to preprepare some information about how these things are made and what they are made from, or you could set that as extension work for some students.
Follow up question:
• Can anyone think of something from home that used to be alive?
Get this experiment here or as part of a bundle of Living Things Experiments here.

